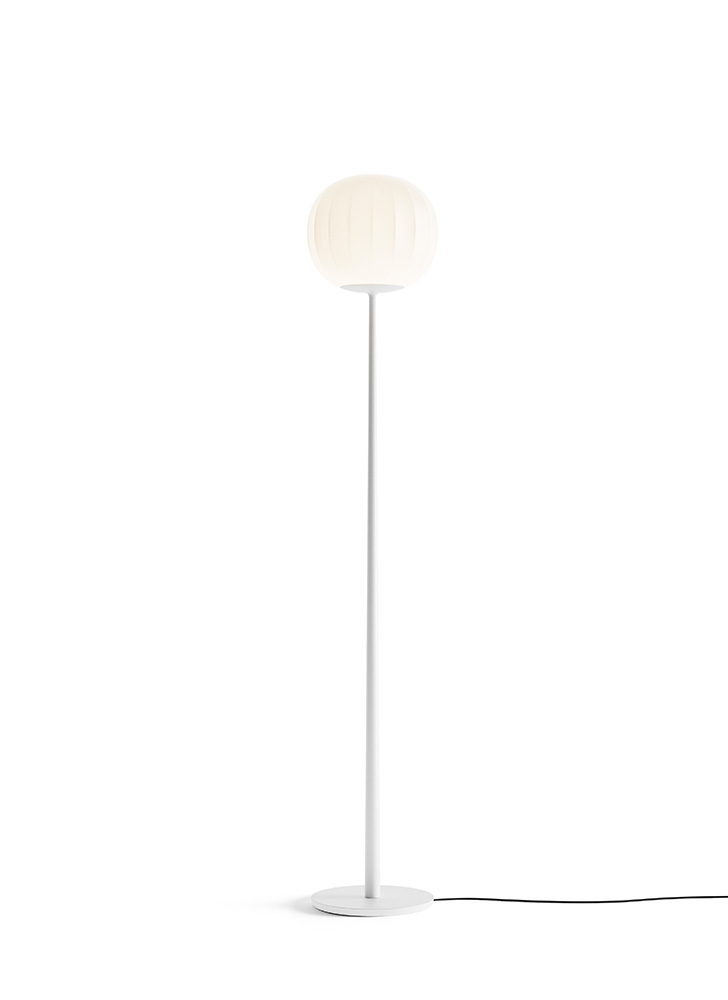
Alex Owen-Hill, Author at RoboDK blog https://robodk.com/blog/author/alex-owen-hill/ News about RoboDK, Industrial Robots, Simulation and Robot Programming Mon, 22 Apr 2024 09:35:12 +0000 en-US hourly 1 Transforming Cell Therapy Manufacturing: The Power of Robotics at Multiply Labs https://robodk.com/blog/cell-therapy-manufacturing/ Mon, 22 Apr 2024 09:35:11 +0000 https://robodk.com/blog/?p=7145 Cell therapy manufacturing is a uniquely complex process in the pharmaceutical industry. It presents unique challenges over other pharmaceutical processes as it requires manufacturers to handle and store living cells. …

The post Transforming Cell Therapy Manufacturing: The Power of Robotics at Multiply Labs appeared first on RoboDK blog.

]]>
Cell therapy manufacturing is a uniquely complex process in the pharmaceutical industry. It presents unique challenges over other pharmaceutical processes as it requires manufacturers to handle and store living cells.

One company, Multiply Labs, has created a system to overcome these challenges by using robots and RoboDK Software.

Using Multiply Labs’ innovative approach, automated cell therapy manufacturing has the potential to significantly reduce costs while ensuring statistically equivalent outcomes to manual processes in terms of cell yields, viability, and phenotype.

This new system could bring about a new era of producing this type of therapy, surpassing the previous time-consuming manual processes, and ultimately, supporting the scalability of cell therapies for patients in need.

Let’s look at how they used RoboDK to create the system.

What Is Cell Therapy Manufacturing

Cell therapy involves growing cells in a controlled environment. These are then placed into the body to replace damaged or diseased cells or modulate the function of the patient’s cells. This therapy is at the forefront of biomedical innovation, being used to treat cancer, autoimmune conditions, and various others.

The challenge with this type of manufacturing is the need to maintain strict purity, potency, and safety throughout the complex multi-stage production process. This involves cultivation of the cells, multiplication, and processing in a controlled environment.

Some of the unique challenges of cell therapy manufacturing include:

  • High complexity of both materials and process.
  • Tracking and testing of cell activity and safety.
  • Need for customization with patient-specific manufacturing.
  • Logistical challenges involved in handling live cells.
  • Scaling these biological processes to be accessible.

The promises of cell therapy are huge… but only with a reliable process for producing the cells.

Introducing Multiply Labs…

This is where Multiply Labs comes in. The company originates from a shared passion for robotics among its founders, who met at MIT.

Based in San Francisco, California, Multiply Labs specializes in developing industry-leading automated manufacturing systems to produce individualized drugs. The team combines a unique blend of mechanical and electrical engineering, software development, and pharmaceutical science.

The company believes that robotics and automation have great potential for improving patient accessibility and unlocking the scalability of these cell therapy treatments. They aim to create flexible robotic systems that are compatible with the market-leading pharmaceutical manufacturing instruments, so that manufacturers do not need to significantly change their existing processes.

Their systems are modular and can operate in parallel. This allows them to achieve high throughput, as scalability is a core concern for many pharmaceutical manufacturers.

Fred Parietti, CEO and Co-Founder says:

At Multiply Labs, we are actively developing a cell therapy robotic system, which can operate market-leading GMP instruments already widely deployed for cell therapy manufacturing. This is part of our ongoing, company-wide quest to pioneer a fully automated, end-to-end process for cell therapy manufacturing. To bring this vision to life during the development process, we use renders to showcase what we’re building.

The Robotic System for Personalized T-Cells

One of the company’s latest developments is a robotic system for cell therapy manufacturing. The company recently released a peer reviewed study showing that a robotic cell expansion process can match the performance, and reduce the cost of a manual process. 

The system leverages robotic modules, automating market-leading instruments currently leveraged for cell therapy manufacturing. Manufacturers have the flexibility to combine and mix and match robotic modules to best match their process, and they can drive high throughput via multiple parallel modules. 

Multiply Labs tested the robotic system against a comparable manual process. They found that the results were statistically indistinguishable.

Fred Parietti, the company’s co-founder and CEO, says:

We are so excited by this initial data as it opens the door to accelerating the availability of cell therapies. This data demonstrates that manufacturers can confidently automate their existing processes for cell expansion, without making significant modifications to the process itself, effectively minimizing bioprocess and regulatory risks.

With more automation, the labor cost of cell therapy manufacturing can be lowered enough to make cell therapies accessible to many more people.

The Role of RoboDK

RoboDK was a key part of creating the company’s modular robotic system. The team used it for early research, simulation creation, debugging, rendering, and various other stages of their development.

A unique aspect of how the team used RoboDK was in their rendering of the simulations, to demonstrate what Multiply Labs is trying to achieve before the physical prototype was ready.

Xiaojie Chen, robotics engineer at Multiply Labs, says:

We started using RoboDK in March 2023 and found it’s an excellent solution to help the team. The RoboDK team also rapidly solved the bugs we saw during the beta, so we are one of the first teams to use this function. The entire project was done incredibly fast, with several team members working closely.

5 Key Ways Multiply Labs Used RoboDK

RoboDK was instrumental in the team’s achievement at various stages of their development.

Here are 5 key ways the team used RoboDK:

  • Early Research and Collision Prevention — The team first used RoboDK to conduct early research tests and ensure that there were no collisions between components.
  • Creating Accurate Simulations — RoboDK’s ability to simulate very accurate motions was a critical factor to Multiply Labs using it.
  • Rendering and Blender Export — The team wanted to create high-quality visual renderings of their simulations to demonstrate the prototype. For this, they created the models in CAD, ran the simulations in RoboDK, then exported into Blender using an Add-in for further rendering.
  • Rapid Response to Feedback — One benefit to using RoboDK is that it allows smooth passing of models with other software packages. Its Blender Export function, for example, allowed the team to save a lot of time and get rapid feedback from the team.
  • Education and Efficiency — The ease of learning was an essential aspect to Multiply Lab’s adoption of RoboDK. It allowed their engineers to focus on engineering rather than learning new software

Changing Pharmaceutical Manufacturing

Multiply Labs is passionate not only about robotics, but about creating a future where manufacturing of life-saving cell therapies is accessible, efficient, and reliable.

Currently, the development and manufacturing of cell therapies are exorbitantly expensive, hindering broad access to life-saving treatments. In fact, as much as 50% of manufacturing costs stem from labor-intensive manual processes and a lack of skilled workers. By employing Multiply Labs’ innovative approach, automated cell therapy manufacturing has the potential to significantly reduce costs while driving increased scalability.

What questions do you have about this? Tell us in the comments below or join the discussion on LinkedIn, Twitter, Facebook, Instagram, or in the RoboDK Forum.. Also, check out our extensive video collection and subscribe to the RoboDK YouTube Channel

The post Transforming Cell Therapy Manufacturing: The Power of Robotics at Multiply Labs appeared first on RoboDK blog.

]]>
Spotlight on… KUKA: How to Program KUKA Robots Easily https://robodk.com/blog/program-kuka-robots/ Thu, 04 Apr 2024 14:14:33 +0000 https://robodk.com/blog/?p=7043 One of “The Big 4” robotics companies in the world, KUKA robots are a very common sight across the world. Possibly the most distinctive thing about KUKA robots is the …

The post Spotlight on… KUKA: How to Program KUKA Robots Easily appeared first on RoboDK blog.

]]>
One of “The Big 4” robotics companies in the world, KUKA robots are a very common sight across the world.

Possibly the most distinctive thing about KUKA robots is the bright orange color of many of their models. The visual appearance of KUKA robots is highly important to the company, which works in close collaboration with industrial designer Mario Selic to shape the unique designs of the robots.

In this spotlight on KUKA, we’ll look at how you can program KUKA robots easily for your chosen application.

The KUKA Story: What Sets KUKA Robots Apart

Founded in 1898 by Johann Josef Keller and Jakob Knappich in Augsburg, Germany, KUKA originally specialized in producing acetylene gas. The gas was used in both domestic and street lighting, making it more affordable than ever before.

In terms of KUKA’s robotics arm, the transformative moment arrived in 1973. The company introduced its FAMULUS robot, the world’s first industrial robot with six electrically driven motor axes.

Over the years, the KUKA has focused on application-specific robotics. For example, it pioneered robotic friction welding in 1966 and had become Europe’s leading manufacturer of welding systems by 1989.

Today, KUKA is renowned for delivering intelligent, dependable, and user-friendly robotic solutions for many application areas.

What Industries are KUKA Robots Used In?

With such a long history focusing on robotics, it’s unsurprising that KUKA robots are used in a wide range of industries.

From traditional robotic industries like automotive and aerospace to emerging industries like entertainment and filmmaking, there is a KUKA model for almost any use you can imagine.

Within each industry, there are many potential applications. For example, within the healthcare industry, there are applications in areas ranging from hospital operating theaters to pharmaceutical machinery delivery.

3 Example Applications for KUKA Robots

Whatever application you’d like to add to your business, it’s almost certain that you can find a KUKA robot that fits the bill.

Here are 3 example applications from different industries that people are already achieving with KUKA robots:

1. Film Industry Motion Control

Film production is an industry that you might not traditionally associate with robotics. However, there are some very interesting emerging applications.

KUKA offers a range of solutions for the film industry through integrators. Examples include programmable motion control systems for high-speed cameras, automatic TV camera control, and special effects.

2. Automotive Assembly and Test Systems

The automotive industry is a core industry for robotic technology. KUKA is the world’s leading provider of production systems in this industry.

Applications span the entire automotive production pipeline, from assembly to testing. As well as traditional tasks, like robotic welding, KUKA also continues to branch into new application areas, like electromobility.

3. Ecommerce Fast, Error-Free Operations

A rising application area for the last few years is the eCommerce industry. We can think of eCommerce as being like the Olympic 100-meter sprint in the world of business, demanding speed and agility.

KUKA provides a customized portfolio of solutions for eCommerce order processing, logistics, and error-free operations.

Options for Programming KUKA Robots

Whatever application you choose for your KUKA robot, it’s important to find a method of programming that helps you to deploy the robot easily and efficiently.

There are 3 main options for programming a KUKA robot:

  1. Brand Programming Langauge: KRL— the primary language for programming is called KUKA Robot Language (KRL). Based on Pascal, this programming language requires a high level of robotics expertise.
  2. Teach Pendant — The go-to method for many KUKA robot users is to use the teach pendant. This time-consuming approach involves manually guiding the robot through movements. The KUKA teach pendant has gone through various versions over the years, including the KRC2, KRC4, and smartPAD.
  3. RoboDK — For a more intuitive and graphical approach to programming, supported by a powerful API if you need it, you can also program your KUKA robots offline using RoboDK.

With RoboDK, you program KUKA robots even without the physical robot present. You just load your chosen KUKA model from the integrated robot library. This streamlines the programming process and reduces unnecessary downtime.

Spotlight on 3 Models in the RoboDK Library

The RoboDK robot library includes an extensive collection of KUKA robots models.

At the time of writing, it includes over 180 Yaskawa models of various types, including 5, 6, and 7 DoF arms, Scara, and palletizing robots, as well as external axes.

Here are 3 models that you can find in the library:

Robot 1: KUKA KR 16 L6 2 KS

The KUKA KR 16 is a 6-axis robot that is used for tasks like dispensing and welding. It offers a 16 kg payload, 1.8 m of reach, and a repeatability of 0.1 mm.

This robot comes with a shelf mount, which can offer a greater depth in the robot’s working envelope and the ability to reach over objects.

Robot 2: KUKA KR 120 R3200 PA

The KUKA KR 120 is a 4-axis robot arm created especially for palletizing tasks. It has an impressive 120 kg payload, 3.2 m of reach, and repeatability of 0.06 mm. To support this high payload, it is very heavy with 1,075 kg weight.

This model is one of KUKA’s QUANTEC PA range, known for their speed, strength, and precision. It is also designed to operate at freezing temperatures without the need for a protective suit, making it well suited to the food processing sector.

Robot 3: KUKA KL 4000 4m

The KUKA KL 4000 is an external axis. This 4 meter, single axis mechanism can handle payloads of up to 4,000 kg. It has a consistent operation across its 4 m of reach and the repeatability is 0.02 mm.

This external axis can operate as an additional axis to a KUKA arm. Its distinct compact carriage design maximizes effective travel through its optimized motor and gear unit arrangement.

How to Program KUKA Robots Easily with RoboDK

If you want to streamline the deployment process for your KUKA industrial robot, it’s worth looking at using RoboDK for your programming.

RoboDK’s rich simulation environment makes it easy to quickly design robot programs and test them before you put the robot into production. The intuitive graphical interface allows you to quickly create robust programs while the API allows you to incorporate any advanced features you want.

To get started, download a trial copy of RoboDK from our download page and load up your favorite robot model.

Which KUKA model do you use and for which applications? Join the discussion on LinkedIn, Twitter, Facebook, Instagram, or in the RoboDK Forum.. Also, check out our extensive video collection and subscribe to the RoboDK YouTube Channel

The post Spotlight on… KUKA: How to Program KUKA Robots Easily appeared first on RoboDK blog.

]]>
The Heated Debate: Robot Welding vs Manual Welding? https://robodk.com/blog/robot-welding-manual-welding/ Wed, 27 Mar 2024 10:53:34 +0000 https://robodk.com/blog/?p=6919 Robotic welding… Manual welding… which is best? Welcome to the grand debate! We are now firmly within the age of automation. As a result, the question of robotic vs manual …

The post The Heated Debate: Robot Welding vs Manual Welding? appeared first on RoboDK blog.

]]>
Robotic welding… Manual welding… which is best? Welcome to the grand debate!

We are now firmly within the age of automation. As a result, the question of robotic vs manual welding is now on the debating table more clearly than ever before.

Which reigns supreme? Robots or human welders?

On one side of the table we have manual welding. The tried and tested method of welding, backed by decades of precedence and the skill and intuition of seasoned craftspeople.

On the other side of the table, we have robotic welding. The newest contender for best welding method. It boasts precision, productivity, and relentless consistency.

Let’s settle this debate once and for all…

Which welding method comes on top?

The 7 Debate Categories to Spark Discussion

As manufacturers, welding is a crucial aspect of many production processes. It can play a major role in determining the quality of your products.

When you look at your process, which categories can you use to compare manual welding with robotic welding?

Here are 7 categories that we’ll be using to compare the two methods:

  1. Speed and Efficiency — The speed and efficiency of a welding method determines how productive your welding process can be. It is a crucial category in the debate.
  2. Weld Quality — The quality of your welds influences both customer satisfaction and product reliability.
  3. Flexibility — The ability to adapt to different projects quickly is important in a dynamic manufacturing environment.
  4. Cost — As a significant factor in all business decisions, cost considerations include not only the initial expense but ongoing running costs.
  5. Risks — Every production method carries risks, both physical and non-physical. From worker injury to cost of inaction, various risks affect welding.
  6. Detail and Precision — It’s important to discuss the level of detail each method can achieve, particularly for products requiring fine details.
  7. Problem Detection — Each method will have a different level of ability at detecting and resolving problems. Faster detection means fewer delays in production.

In the debate points below, we will draw from these 7 categories to compare manual and robotic welding.

Manual Welding: Traditional, Reliable and Adaptable

In the arena of welding techniques, manual welding holds its ground as a traditional, reliable, and highly adaptable method.

Let’s start the debate with manual welding’s biggest strength: flexibility.

For flexibility, manual welding certainly outperforms its robotic counterpart. Human welders can seamlessly shift between projects without the need for extensive reconfiguration. This makes manual welding particularly suited to custom orders and one-off jobs.

Humans are adaptable. This is also why manual welding can be better at problem detection. Adapting a robot requires the input of humans.

The cost of manual welding can also be quite low, particularly the upfront cost. Unless you have to hire new welding professionals — which can be costly and difficult given the skills shortage — manual welding is a process that has familiar costs.

It’s true that there are some disadvantages to manual welding. Increased risk of worker injury is certainly something to consider, as well as lower precision and an inconsistent weld quality.

However, manual welding truly excels for custom, artisan welding jobs that would require extensive programming to do with a robot.

Robotic Welding: Efficient, Precise and Consistent

Robotic welding is the “new kid on the block” — the welding method that is set to become a core part of any welding process. It is a force to be reckoned with in the world of manufacturing.

We can’t talk about robotic welding without mentioning its consistency. Robots are extremely consistent, producing the same high-quality welds time and time again. With this consistency comes faster, more precise welds, and a lower cost per weld over the long term.

While robots tend to be less effective at detecting problems on-the-fly than humans, they are also less likely to make errors as they are not subject to tiredness. Robots also don’t need breaks, so can be hugely more productive than manual welding.

It’s true that robots are less flexible than humans. However, this is why robotic welding is so well suited to routine, higher-volume welding tasks.

Using robots for welding also reduces the potential physical risks, as the human worker is no longer operating dangerous welding machinery. This helps to make the workplace a safer environment for all.

The Verdict: Which Welding Method Strikes the Hottest Iron?

The debate points have been made… so which method is best? Manual welding or robotic welding?

Let’s look at each of our 7 debate categories:

  1. Speed and Efficiency — Robotic welding has the upper hand with a quicker work rate and higher output. However, this is less valuable on low-volume, custom jobs.
  2. Weld Quality — Robots are a clear winner with consistent high-quality welds.
  3. Flexibility — Manual welding wins in this category. Human workers can easily shift between projects without reconfiguration.
  4. Cost — Let’s call this one a draw. There are many factors that affect the cost of the welding method, including labor costs, machine maintenance costs, and the varying upfront costs of robotic hardware.
  5. Risks — There are risks with both methods. However, with robotic welding, the physical safety risks are significantly reduced compared to manual welding.
  6. Detail and Precision — Robots tend to be more consistently precise than humans, so robot welding is a strong contender. But, for artisan-type detail, manual welding is usually the better option.
  7. Problem Detection — Humans are often better at detecting and responding quickly to problems… however, they are also likely to make more mistakes than robotic welding.

The conclusion? While manual welding offers more flexibility and problem detection, these don’t fully offset the advantages offered by robotic welding.

Which Method Should You Choose?

Ultimately, the decision between manual and robotic welding comes down to your specific manufacturing needs.

If you are producing one-off, custom welds that require artisan levels of skill, manual welding will certainly be your best bet. But, if you have more consistent welding needs, robotic welding is surely a top contender.

As with many business decisions, there is no definitive answer to the debate of robot welding vs manual welding.

But, you can make your robot programming easy by using RoboDK and our Welding Add-in.

Which welding methods do you use in your business? Tell us in the comments below or join the discussion on LinkedIn, Twitter, Facebook, Instagram, or in the RoboDK Forum.. Also, check out our extensive video collection and subscribe to the RoboDK YouTube Channel

The post The Heated Debate: Robot Welding vs Manual Welding? appeared first on RoboDK blog.

]]>
Spotlight on… FANUC: How to Program FANUC Robots Easily https://robodk.com/blog/program-fanuc-robots/ Thu, 21 Mar 2024 11:58:41 +0000 https://robodk.com/blog/?p=7044 When you see a big yellow robot, you can almost be certain it’s a FANUC. FANUC is one of “The Big 4” robotics companies in the world. Catering to a …

The post Spotlight on… FANUC: How to Program FANUC Robots Easily appeared first on RoboDK blog.

]]>
When you see a big yellow robot, you can almost be certain it’s a FANUC.

FANUC is one of “The Big 4” robotics companies in the world. Catering to a wide array of industries, these Japanese-made robots are known for their adaptability, power, and ubiquitousness.

The company’s influence is far-reaching, with a notable 15% share of the Chinese industrial robot market. They are dedicated to growing the capabilities of robotic systems, investing in technologies like robotic machine learning and cloud robotics.

In this spotlight on FANUC, we’ll look at how you can program FANUC robots easily for your chosen application.

The FANUC Story: What Sets FANUC Robots Apart

Founded in Japan in 1956 by Dr. Seiuemon Inaba, FANUC has grown to become a global leader in factory automation.

The company started by producing servo motors and computer numerical control (CNC) systems. Throughout his long career, Dr. Inaba receive many honors for his pioneering achievements in creating CNC tools and factory automation.

As one of the few companies in the industry to develop and manufacture all its major components in house, FANUC robots are known for their reliability, predictability, and ease of repair. Customers benefit from lifetime product support for as long as they use their FANUC products in production.

What Industries are FANUC Robots Used In?

FANUC robots are a common sight in many industries, showing the versatility and range of their products.

The automotive manufacturing industry is a notable industry, where FANUC robots help to streamline assembly lines, improve quality control, and increase productivity. It also remains a worldwide leader in automation for CNC control systems, with solutions like its ROBODRILL and ROBOCUT.

Other industries where FANUC robots are common include electronics manufacturing, food manufacturing, and the pharmaceutical industry.

In 2021, FANUC cemented its place as a worldwide leader in robotics when it celebrated the production of its 750,000th robot.

3 Example Applications for KUKA Robots

There are FANUC robots available for almost any almost every application you can think of.

Here are 3 example applications from different industries that people are already achieving with FANUC robots:

1. Complex CNC Machining

With the company’s long history in CNC solutions, it’s unsurprising that FANUC robots are now involved CNC machining.

Robot machining is an ideal application for robots, helping you to machine intricate shapes that would be impossible with conventional CNC tools. With FANUC robots, you can achieve precise tolerances even to the nanometer level.

2. Painting Solutions

FANUC claims to offer the largest selection of painting robots in the robotics industry.

Robot painting is a hazardous task, requiring special explosion-proof robots that can handle the complex task of painting. By using a robot to paint, you can achieve a more consistent paint application, reduce waste, and increase your uptime for painting operations.

3. Laser Cutting

FANUC is pioneering in the industry with their application of laser cutting using robots. These involve using a robot to operate a laser cutting tool.

Models like the versatile six-axis FANUC M-20iB/25 robot and the 0i-LF Plus offer high cutting performance in a simple to use system.

Options for Programming FANUC Robots

Whatever application you choose for your FANUC robot, it’s important to find a method of programming that helps you to deploy the robot easily and efficiently.

There are 3 main options for programming a FANUC robot:

  1. Brand Programming Langauges: Karel and TP— the primary language for programming is called Karel, a Pascal-derived programming language that requires a high level of robotics expertise. There is also TP, the language that is used in FANUC teach pendants.
  2. Teach Pendant — Possibly the most common method for programming FANUC robots is to “jog” the robot using the teach pendant. This time-consuming approach involves manually guiding the robot through movements. As well as being complex to program, it also takes a lot of work to make changes.
  3. RoboDK — For a more intuitive and graphical approach to programming, supported by a powerful API if you need it, you can also program your KUKA robots offline using RoboDK.

With RoboDK, you program FANUC robots even without the physical robot present. You just load your chosen FANUC model from the integrated robot library. This streamlines the programming process and reduces unnecessary downtime.

Spotlight on 3 Models in the RoboDK Library

The RoboDK robot library includes an extensive collection of FANUC robots models.

At the time of writing, it includes over 100 FANUC models of various types, including 5 and 6 DoF arms, Delta, SCARA, and palletizing robots, as well as hexapod robots.

Here are 3 models that you can find in the library:

Robot 1: FANUC LR Mate 100iB

The LR Mate 100iBz is a compact tabletop 5-axis robot that is often used for material handling tasks. It offers a 5 kg payload, 620 mm of reach, and a repeatability of 0.04 mm.

LR Mate robots come in various models, for specific target application areas. This includes food and beverage, clean room, and washproof versions.

Robot 2: FANUC SR-12iA

The SR-12iA is a 4-axis SCARA robot arm used in assembly and material handling applications. It has a 12 kg payload, 900 mm of reach, and repeatability of 0.015 mm.

This model offers high wrist inertia of up to 0.45 kgm2. This makes it particularly suitable for some assembly applications, such as battery and solar panel installations. It also comes in a 20 kg payload version.

Robot 3: Fanuc F-200iB

The F-200iB is a 6 Degrees of Freedom hexapod platform. It can handle payloads of up to 100 kg, offers 437 mm of reach and has a repeatability of 0.1 mm.

This platform is a parallel link robot and is designed for a range of manufacturing and automotive assembly processes.

How to Program FANUC Robots Easily with RoboDK

If you want to streamline the deployment process for your FANUC industrial robot, it’s worth looking at using RoboDK for your programming.

RoboDK’s rich simulation environment makes it easy to quickly design robot programs and test them before you put the robot into production. The intuitive graphical interface allows you to quickly create robust programs while the API allows you to incorporate any advanced features you want.

To get started, download a trial copy of RoboDK from our download page and load up your favorite robot model.

Which FANUC model do you use and for which applications? Join the discussion on LinkedIn, Twitter, Facebook, Instagram, or in the RoboDK Forum.. Also, check out our extensive video collection and subscribe to the RoboDK YouTube Channel

The post Spotlight on… FANUC: How to Program FANUC Robots Easily appeared first on RoboDK blog.

]]>
10 Essential Robot Simulation Features: A Deep Dive Into the Power of RoboDK https://robodk.com/blog/robot-simulation-features/ Mon, 11 Mar 2024 12:01:50 +0000 https://robodk.com/blog/?p=7045 In robotics, simulation plays a vital role in optimizing the efficiency of your robot programs and reducing potential errors. But how do you select the right features for your specific …

The post 10 Essential Robot Simulation Features: A Deep Dive Into the Power of RoboDK appeared first on RoboDK blog.

]]>
In robotics, simulation plays a vital role in optimizing the efficiency of your robot programs and reducing potential errors. But how do you select the right features for your specific application?

There are many features that you could use in a robot simulator. Complex physics simulation, advanced camera modeling, artificial intelligent planning… the list keeps growing as the technologies advance.

It’s always a good idea to prioritize simplicity and functionality. If a particular simulation feature is unnecessary to create your robot program, it will only hold you back from creating an efficient solution.

RoboDK has a vast range of possible features that you can use in your simulations.

Here’s a look at what they are and how you can use them…

The Need for Simplicity

When it comes to offline programming and simulation, complexity is your enemy.

If your robot simulation is filled with unnecessary elements, it will be slower to run and more likely to create problems later on. Remember that you are not trying to create a highly realistic simulation of the robot and its environment. Your aim is to create a robust robot program that achieves your production goals.

As we’ve said previously… your robot simulation doesn’t need wallpaper.

Some features are usually unnecessary in robot simulation such as some advanced physics simulations, complex lighting, and high-definition visual rendering. While these can add realism and aesthetic appeal to your simulation, they don’t help you make a more reliable robotic system.

10 Powerful Simulation Features in RoboDK

Keeping in mind the need for simplicity, what features are useful in a robot simulator?

RoboDK contains many powerful simulation features. Not all of them will be suitable for your specific application. But, used in the right way, they can improve your simulation significantly.

Here are 10 features that you can find in RoboDK:

1. Calibration With the Real World

For industrial robotics, a simulation is only useful if you can use it to program your real world robot. This means you need to be able to quickly and accurately calibrate the robot to the real world coordinate.

There is a range of calibration options for RoboDK. One is our product RoboDK TwinTool that allows you to calibrate your robot tools with an automated calibration procedure and an off-the-shelf sensor.

2. Reliable Inverse Kinematics

The inverse kinematics of a robot is the algorithm that converts your desired tool position to the robot’s joint positions. It is a vital part of any robot simulation.

RoboDK includes inverse kinematics for all our supported robots. You can customize your inverse kinematic solution to suit your specific needs.

3. Application-Specific Programming Tools

Some applications are just easier to perform when they are supported by application-specific tools. RoboDK has some powerful tools for a range of common applications.

Our WeaveGenerator is one such tool, giving you the functionality to quickly add weave patterns to your robotic welding task.

4. CAD/CAM Integration

Your chosen robot simulator will make your life significantly more useful when it seamlessly integrates with your existing software. In many robot applications, this means integrating with your chosen CAD/CAM program.

We often add support for new CAD/CAM integrations such as our recent addition of the BobCAD-CAM Plugin.

5. Collision-Free Planning

Artificial intelligence (AI) is a growing technology in many industries right now, and robotics is no different.

One useful AI feature in robot simulation is collision-free planning. This feature in RoboDK allows you to automatically generate a collision-free path for your robot between two chosen points in your workplace.

6. Gravity When Needed

Gravity simulation is not always necessary in robot simulation and sometimes can be an unnecessary complication. However, it is a requirement in some situations.

RoboDK now includes a Gravity Plugin that enables you to activate a simple form of gravity if your application needs it.

7. Real-Time Capabilities

While most users of RoboDK use it to program their robots offline in a simulation, the software also supports real time control of robots.

Our real-time plugin allows you to add this capability to your program and control your physical robot within the software itself.

8. High Speed for Complex Projects

The bigger and more complex your simulation, the slower it is to run. This can make complex projects very slow.

We have recently made improvements to RoboDK that double the speed of simulation for complex projects. This includes support for textures and GPU-accelerated rendering.

9. Realistic Camera Simulation

Graphical realism is usually not the most important functionality in robotic simulations. However, it can be more important when you are using robotic vision.

RoboDK includes several features to make your simulated cameras more realistic. This helps you to test vision functionality in simulations before testing on the real robotic system.

10. Extensive Robot Support

The final feature that really helps your programming productivity is when your chosen simulator supports a wide range of robot models.

RoboDK includes support for over 1000 robot models from over 70 different robot brands. In our extensive Robot Library includes support for various robot brands, including Omron, Techman, Fanuc, KUKA, Universal Robots, and many more.

Choosing the Right Simulator

Haven’t decided which robot simulator you will use?

How can you select the right one for your needs?

It’s important to find a simulator that makes your life easier when programming your robot rather than introducing unnecessary difficulties.

There are various steps you can take when comparing different simulators for your needs. These include evaluating your business requirements, focusing on your specific application needs, and seeking the assistance of a supportive community.

Learn about the whole process of finding a solution in our article How to Choose a Robot Simulator.

3D Simulator Software

RoboDK: A Reliable Choice

With its wide array of features and capabilities, RoboDK stands out as a reliable and widely trusted robot simulation platform.

Many people in your situation are already using RoboDK for a diverse range of applications and industries.

With native support for hundreds of robot models and brands, RoboDK offers an impressive selection of simulation features to make your robot deployment as easy as possible.

What simulation features do you most need in a robot simulator? Tell us in the comments below or join the discussion on LinkedIn, Twitter, Facebook, Instagram, or in the RoboDK Forum.. Also, check out our extensive video collection and subscribe to the RoboDK YouTube Channel

The post 10 Essential Robot Simulation Features: A Deep Dive Into the Power of RoboDK appeared first on RoboDK blog.

]]>
Spotlight on… Yaskawa: How to Program Yaskawa Robots Easily https://robodk.com/blog/spotlight-on-yaskawa-how-to-program-yaskawa-robots-easily/ Mon, 04 Mar 2024 11:18:55 +0000 https://robodk.com/blog/?p=7042 Yaskawa, one of the biggest Japanese manufacturers of robotic hardware, has securely made its name in the global worldwide robotics landscape. Established in 1915, Yaskawa has continually marked itself as …

The post Spotlight on… Yaskawa: How to Program Yaskawa Robots Easily appeared first on RoboDK blog.

]]>
Yaskawa, one of the biggest Japanese manufacturers of robotic hardware, has securely made its name in the global worldwide robotics landscape.

Established in 1915, Yaskawa has continually marked itself as an innovator through its Motoman series of industrial robots. The company has been constantly innovating in large and small ways, from introducing the L10WA in 1983 (the first 6-axis robot to feature an extra wrist) to the new MotoMini, one of the smallest and lightest 6-axis robot in the industry.

In this spotlight on Yaskawa, we’ll look at how you can program Yaskawa robots easily for your chosen application.

The Yaskawa Story: What Sets Yaskawa Robots Apart

Yaskawa has passed some momentous milestones in recent years. In 2015, it celebrated its 100th anniversary and in 2021 they sold their 500,000th robot. With this rising popularity, many more people are using Yaskawa robots for a wide range of applications.

Founded by Daigorou Yasukawa, the company’s story began in 1915 when it began manufacturing three-phase induction motors. Yaskawa’s robotic journey began in the 1960s with the introduction of various robotic products, including MOTO fingers and arms. Their first full electric robot, MOTOMAN-L10, was completed in 1977.

Yaskawa’s core brand values revolve around the principles of quality, profitability, and market satisfaction. The company is committed to using its technologies to improve management efficiency and contribute to social development and human welfare.

What Industries are Yaskawa Robots Used In?

Yaskawa’s industrial robots have found widespread adoption across various sectors, solidifying its position as a global leader.

Within the electrical and electronic manufacturing industry, companies utilize Yaskawa robots throughout the entire production process, from upstream production to downstream testing and shipping. Their smaller robots prove particularly advantageous for manufacturers operating within limited space.

For industries like biomedical and semiconductor manufacturing, Yaskawa provides specific robot solutions that can operate under hygiene control requirements.

Other industries include food production, logistics, and automotive manufacturing.

3 Example Applications for Yaskawa Robots

Whatever application you are looking to deploy, it’s likely a Yaskawa robot exists to help you to achieve it.

Here are 3 example applications from different industries that people are already achieving with Yaskawa robots:

1. Electronics mounting, welding, and painting

In the “3C” industry (Communication, Computer, and Consumer Electronics), robots are involved at almost all stages.

Yaskawa robots are often used in the construction and finishing of circuit boards. This includes assembly of the casings, welding and soldering of metal pieces, and painting of the final product.

A particular challenge for such applications is often space restrictions, which Yaskawa has addressed with a range of small, light robots.

2. Experiment preparation and analysis

In the biomedical manufacturing industry, Yaskawa robotic solutions that operate under strict hygiene controls with high precision.

One type of application in this industry includes the preparation of biological specimens for testing and running of the tests.

By using such robots, the skilled biological researchers can focus on more high-level tasks like analyzing the data gathered during the tests.

3. Flat Panel Display Glass Transporting

Many applications in the semiconductor manufacturing industry are suitable for robotic automation.

One such task involves manufacturing Flat Panel Display (FPD) glass, which companies use to produce computer monitors, smartphones, and televisions.

Robots are an ideal solution for handling and processing of this glass as even small amounts of dust can jeopardize the product quality.

Options for Programming Yaskawa Robots

Whatever application you choose for your Yaskawa robot, it’s important to find a method of programming that helps you to deploy the robot easily and efficiently.

There are 3 main options for programming a Yaskawa robot:

  1. Brand Programming Langauge: Inform II — the primary language for programming is Inform II, though Yaskawa also supports some PLC-integrated options. This is the most labor-intensive method.
  2. Teach Pendant — A very common method of teaching Yaskawa robots is to use the teach pendant, which involves manually guiding the robot through movements. It is a time-consuming approach.
  3. RoboDK — For a more intuitive and graphical approach to programming, supported by a powerful API if you need it, you can also program your Yaskawa robots offline using RoboDK.

Spotlight on 3 Models in the RoboDK Library

The robot library includes an extensive collection of Yaskawa robots models.

At the time of writing, it includes over 90 Yaskawa models, of various types, including 5 and 6 DoF arms, Delta, Scara, and palletizing robots, as well as external axes.

Here are 3 models that you can find in the library:

Robot 1: Yaskawa HC10

The Yaskawa HC10 is a 6-axis robot that is commonly used for arc welding applications. It offers a 10 kg payload, 1.2 m of reach, and a repeatability of 0.1 mm.

This collaborative robot is designed to enhance current production by adding collaborative welding capabilities.

Robot 2: Motoman MPP3

The Motoman MPP3 is a 4-axis Delta robot that balances compact design and operational reach. It has a 1 kg payload, 650 mm of reach, and repeatability of 0.1 mm. It is also on the heavy side at 115 kg weight.

Optimized for primary packaging this robot is ideal for the food industry as it uses an NSF-H1 certified food-grade lubricants and anti-corrosive coating.

Robot 3: Motoman MPL800II

The Motoman MPL800II is a 4-axis palletizing robot arm offering an impressive 800 kg of payload and 3.2 m of reach. The repeatability is 0.5 mm and its weight is 2550 kg.

With its large payload, this is the largest palletizing robot that Yaskawa manufactures.

How to Program Yaskawa Robots Easily with RoboDK

If you want to streamline the deployment process for your Yaskawa industrial robot, it’s worth looking at using RoboDK for your programming.

RoboDK’s rich simulation environment makes it easy to quickly design robot programs and test them before you put the robot into production. The intuitive graphical interface allows you to quickly create robust programs while the API allows you to incorporate any advanced features you want.

To start, download a trial copy of RoboDK from our download page and load up your favorite robot model.

Which Yaskawa model do you use and for which applications? Tell us in the comments below or join the discussion on LinkedIn, Twitter, Facebook, Instagram, or in the RoboDK Forum.. Also, check out our extensive video collection and subscribe to the RoboDK YouTube Channel

The post Spotlight on… Yaskawa: How to Program Yaskawa Robots Easily appeared first on RoboDK blog.

]]>
Tech Innovation for the Juice Industry: A Case Study on ROBOTTLE https://robodk.com/blog/tech-innovation-juice-industry/ Tue, 13 Feb 2024 12:15:45 +0000 https://robodk.com/blog/?p=6913 How can robotic technology help with making juice? The ROBOTTLE project, led by Ahmed Tamer and Omar Abdelaziz, sets out to change the food and beverage industry. In the constantly developing …

The post Tech Innovation for the Juice Industry: A Case Study on ROBOTTLE appeared first on RoboDK blog.

]]>
How can robotic technology help with making juice? The ROBOTTLE project, led by Ahmed Tamer and Omar Abdelaziz, sets out to change the food and beverage industry.

In the constantly developing food and beverage industry, companies are always looking for new ways to keep up with the pace of technology. People are looking for ways to reduce the chasm between online convenience and the physical restrictions of production and delivery of products.

Robotics in this industry is growing at an impressive speed. Food and beverage industry automation increased 25% between 2020 and 2021.

As in many industries, the Covid-19 pandemic further sped up growth as companies looked for ways to minimize human contact.

One project from an aerospace AI team used RoboDK to propose a solution for automated juice production…

Introducing ROBOTTLE…

The ROBOTTLE project, led by Ahmed Tamer and Omar Abdelaziz, the project’s mission is to pioneer the integration of advanced technologies into the food and beverage industry through robotics and AI.

By focusing on juice production, the team aims to empower businesses and employees to add more creativity and better customer service to their operations.

A Service-Optimized Robot Juice Maker?

Imagine waking up early in the morning, the sun’s light pouring through your window…

You go to your local juice shop for a rejuvenating juice or smoothie, fully expecting you will have to stand in a long queue while you wait for your drink.

But, instead of a long wait, you see that the workers in the shop are working with impressive speed and efficiency. Behind the counter, a robot juice maker operates alongside the humans, helping them to deliver custom-made juices quickly.

ROBOTTLE is a proof of concept to show this vision to the world. By using existing robotic hardware and programming through RoboDK, Ahmed Tamer’s team aims to help juice shops, cafes, and restaurants to adopt automation quickly and easily.

Such a system can benefit shops in several beneficial ways, including improved personalization, efficiency, and consistency.

Tamer explains: “The ideal users of this feature are those who not only dream and design but also yearn to witness their creative visions come to life, seeing their handiwork function seamlessly and effectively in real-world scenarios.”

The Team’s Robotic Setup

ROBOTTLE uses combines a selection of robotic hardware and software technologies to create an automated juice-making system.

The key hardware components of the system include:

  • The Kassow KR0810 robot as the core autonomous element. This lightweight and compact 7-axis robot has a reach of 850 mm and a payload of 10 kg.
  • Semi-autonomous juice-making machines.
  • Sensors and end-of-arm tools to detect and manipulate the ingredients.
  • A mobile phone with the system’s app.

The key software components of the system include:

  • RoboDK to simulate and program the system.
  • Shaper3D CAD software to model the components.

Making the Public Part of the Journey

A challenge that the team faced was how to make the public and end users an integral part of their journey.

The goal wasn’t just to create a functional juice-making robot… the team wanted to help people be more creative with their juice creations.

Tamer says:

“We believe in the power of inclusivity and wanted everyone to witness the mechanics of how our robot functions. Our vision is to seamlessly integrate innovation and technology in the food and beverage industry by helping juice stores, as a first step, to reach the global community.”

To achieve this, the team prioritized their system’s ease-of-use.

The operation of the application is very straightforward. The user simply selects their personalized drink order using the phone application. Then, the robot gets to work. In less than a minute, the drink is ready!

How They Used RoboDK

RoboDK played a crucial role in the project and animating the team’s vision. By using the RoboDK Python API, they could combine the kinematics and dynamics of the robot with their user-friendly interface.

Tamer explains:

“Having worked with various robotic software platforms, I found that RoboDK’s user-friendly interface brought us closer to bringing ROBOTTLE to life.”

The application used Shapr3D to intricately craft the components of the system.

From here, RoboDK’s impressive compatibility of CAD software components came into play. It allowed them to seamlessly import these components, using standard CAD file formats, into the robotic simulation. From here, programming the robot was a simple task.

As a result, RoboDK was not merely a tool, but a vital component in the project’s success. It bridged the gap between conceptualization and realization of the team’s vision.

Future Plans

ROBOTTLE’s journey to create a robust juice-making robot doesn’t end at simulation.

Tamer and the team are working on various aspects of the deployment.

A recent development includes the development of a cleaning procedure, helping to keep all components of the system in sanitary working order.

The team has also ventured into robotic coffee making, building on the same techniques and ideas they have explored with juice making.

Users and members of the public remain at the very center of their operations.

As the team announced recently:

“We want to extend our thanks to the amazing people, pioneers, innovators, and visionaries who showed us support. Your confidence in our mission fuels our innovation and drives us forward. We are excited about what we will continue to achieve together and thank you for believing in us.”

What aspects of food and beverage production could you automate? Tell us in the comments below or join the discussion on LinkedIn, Twitter, Facebook, Instagram, or in the RoboDK Forum.. Also, check out our extensive video collection and subscribe to the RoboDK YouTube Channel

The post Tech Innovation for the Juice Industry: A Case Study on ROBOTTLE appeared first on RoboDK blog.

]]>
RoboDK Welding Add-in: Sparks are Flying with our New Feature https://robodk.com/blog/robodk-welding-addin/ Mon, 05 Feb 2024 14:01:01 +0000 https://robodk.com/blog/?p=6915 Robotic welding is now a tried and tested solution for manufacturers looking to improve their welding process. As the shortage of skilled workers continues to rise, automation is increasingly an …

The post RoboDK Welding Add-in: Sparks are Flying with our New Feature appeared first on RoboDK blog.

]]>
Robotic welding is now a tried and tested solution for manufacturers looking to improve their welding process. As the shortage of skilled workers continues to rise, automation is increasingly an excellent solution.

But programming welding robots can be a challenge, especially when you don’t have experience deploying and using robots.

Enter the new Welding Add-in for RoboDK!

Our new Add-in makes programming your welding task easier than ever before. With a few simple steps, you can set up powerful welding programs by setting a few simple parameters.

Here’s what you can expect from the Welding Add-in and how you can get the most from it…

The Need for Simpler Robotic Welding Programming

According to a US figures, there was a need for around 375,000 welding professionals to fill job openings in 2023. But, finding these professionals is becoming an increasingly tough job for manufacturing companies.

There is a severe shortage of welding talent in many countries right now. We can attribute this to factors such as the aging workforce, deindustrialization, and a preference for knowledge-based work among young adults.

The impact of this shortage is putting a strain on many companies. It leads to longer lead times for work, production problems, and higher manufacturing costs for businesses.

Adding robots to your welding process can help to bridge the gap left by the lower number of human welders. However, the problem is that most welding professionals have little to no experience with robots.

Human expertise is vital for creating an automated welding process. But welders might struggle to work with robots even when they are keen to learn.

This is why easy programming options are so necessary.

7 Key Features of Welding with RoboDK

When combined with RoboDK, the new Add-in offers some valuable features to help you quickly set up a powerful welding task.

Here are 7 key features you can use:

  • Welding Simulation — Welding is an extremely common task, particularly in the automotive industry. RoboDK’s capabilities allow you to create precise, technologically adequate and collision-free welding trajectories.
  • Component Simulation — RoboDK allows you to load your robot as well as all the other components of your application into the simulation environment. You can also create other shapes with the Shape Add-in.
  • Trajectory Planning — The Add-in helps you create collision-free paths between subsequent points in your welding task. You can simply use the collision detector or you can autogenerate new trajectories using our AI planner.
  • Predefined Weld Profiles — You can create multiple welding profiles for different welding tasks with predefined modes and visualization settings.
  • Add Custom Code Instructions — Making changes to your program to suit your specific setup is very easy when you add custom code instructions.
  • Cycle Time Estimation — An extremely useful feature of RoboDK is that it can estimate the cycle time for a particular task, helping you to continuously improve the efficiency of your program.
  • Robot Program Generation — While simulation alone can be useful for planning your robot program, the real power of RoboDK comes when you use it to generate your robot program. When it’s set up with your specific robot model, you can do this at the touch of a button.

These features — and many more within RoboDK — offer a robust robot programming interface for your welding tasks. Additionally, RoboDK’s integration with gantry systems from Lucas France enhances its capabilities further.

How to Use the New RoboDK Welding Add-in

To use the RoboDK Welding Add-in, first ensure that you have the core software properly installed and running on your device.

You can get the latest version of RoboDK from our download page

Then complete the following steps to start your welding application:

  1. Start by downloading the Add-in for free from our Add-in Marketplace. You can also load it directly in RoboDK by activating the App Loader.
  2. Load the necessary models, robots, and tools into your simulation. Remember that you don’t need to include all objects from your robot’s physical environment. Only include those components that will affect the welding task.
  3. Set up your tool (TCP) in RoboDK with the welding gun. There are several of these models in the Robot Library, or you can use your own
  4. Create toolpaths and use the Welding Add-in to add specific welding commands.
  5. Simulate the robot program and identify which aspects of your application needs improvement.
  6. Double-check for any collisions that may have been generated using RoboDK’s collision detector.
  7. Generate the robot program and send it to your welding robot.
  8. Test the generated welding program on your robot. Note any changes you need to make to your program and update them within RoboDK.
  9. When you have debugged the program fully, you can put the welding robot into production.
  10. Plan to come back to your robot application after some time to see which aspects of the welding task you can improve.

These are just the overall steps to using the Welding Add-in. For a more detailed tutorial, go to our dedicated page on the documentation site

What You Can Expect With the New Add-in

If you are using robotics to improve your welding application, the new Add-in could be a game-changer.

If you are already an experienced user of RoboDK, you can expect to increase your productivity when programming welding tasks. This can help you reduce the time to program a new welding procedure and have more ways to improve existing welding.

If you are new to RoboDK and welding is your first robotic application, the Welding Add-in will help reduce the time and effort you take to get used to robot programming. With this application under your belt, you can then create even more impactful applications.

Which welding tasks would you like to automate? Tell us in the comments below or join the discussion on LinkedIn, Twitter, Facebook, Instagram, or in the RoboDK Forum.. Also, check out our extensive video collection and subscribe to the RoboDK YouTube Channel

The post RoboDK Welding Add-in: Sparks are Flying with our New Feature appeared first on RoboDK blog.

]]>
Creating Realistic Virtual Environments for Robot Simulation in RoboDK https://robodk.com/blog/creating-realistic-virtual-environments-robot-simulation/ Thu, 25 Jan 2024 14:00:11 +0000 https://robodk.com/blog/?p=6795 How can you create a realistic environment for your robot deployment? And, indeed, should your simulation be highly realistic? It’s important to understand the delicate balance between realism and usefulness …

The post Creating Realistic Virtual Environments for Robot Simulation in RoboDK appeared first on RoboDK blog.

]]>
How can you create a realistic environment for your robot deployment?

And, indeed, should your simulation be highly realistic?

It’s important to understand the delicate balance between realism and usefulness in robotic simulations.

On the one hand, high-level realism allows you to create a more accurate depiction of how the robot will perform in a real-world setting. This helps you to create simulations that more closely match the operating conditions in your facility. On the other hand, striving for absolute realism in your simulation can compromise its usefulness. The simulation can become overly complex and time-consuming, creating a system that is impractical.

The most useful level of realism for your virtual environments is one that accurately reproduces the robot’s task, while remaining streamlined and efficient.

Here’s how to judge and create that level of realism.

What Does It Mean to Have a Realistic Simulation?

Realism refers to how accurately a simulation replicates the real-world behavior and functionality of the robot. This includes the robot’s movement dynamics, interaction with the environment, and operation.

It’s important to understand that a realistic simulation isn’t necessarily one that looks visually pleasing. Qualities of realism like complex lighting and shadows, high-definition rendering, and advanced surface modeling are not usually necessary. While these attributes might enhance the visual appeal of the simulation, they usually don’t contribute to the robot’s performance.

Instead, a realistic simulation should focus on aspects that directly affect the robot’s performance.

Remember, the point of adding realism is not to have an accurate simulation… it’s to have a useful robot.

3 Types of Realism for Effective Robotic Simulation

There are various ways you can look at realism in robotic simulations. For example, you can split it into different types.

Here’s one way to look at 3 types of simulation:

1. Operational Realism

Operational realism refers to the accurate representation of the actual operations of the robots. This involves faithful representation of the robot’s kinetic and dynamic properties and its interaction with the environment.

The primary purpose of operational realism is to create a robot program that will perform optimally in the real-world environment.

2. Visual Realism

Visual realism refers to the accurate graphical rendering of the simulation. With it, you create a visually appealing virtual representation of the real-world environment.

While visual realism might not directly affect the operational effectiveness of the robot, it can be very important for certain applications. For example, if your application uses [robot vision sensors,][RKCAMERA], high levels of visual realism can help you accurately test this sense.

3. Physics Realism

Physics realism refers to accurate modeling of the physical laws that govern the environment where the robot operates. This includes factors like gravity, friction, and collision dynamics that might affect the robot’s performance.

This is one area where you need to strike a balance with your simulation. If you add more physical realism than is necessary, your simulation can quickly become unwieldy.

How Simulation Realism Affects Robot Deployment

When you want to deploy a robot to your workplace, it’s a good idea to start by identifying the level of simulation realism that will be necessary. This will vary depending on your task and application area.

The wrong level of realism in your virtual environment could negatively affect the deployment.

For example, here are some disadvantages to using an overly realistic simulation:

  • Increased computational load — Highly realistic simulations use more computational resources, which slows down the simulation.
  • Complex debugging — More realism usually leads to programs that are harder to maintain and debug.
  • Cost and time — Creating very realistic simulations often takes longer and costs more in terms of computer resources and programming.
  • Inaccuracy from overfitting — No simulation is 100% accurate to the real world. As a result, a higher level of realism can actually lead to a worse operation of the physical robot. This is known as “overfitting.”
  • Unnecessary details — Any details that are not relevant to the robot’s operation are probably a distraction.

By stripping away unnecessary details from your robot simulation, you can focus on the critical aspects of the robot’s operation and prevent overfitting.

The Realistic Robot Simulation (RRS) Project and RoboDK

In RoboDK, we are dedicated to address a significant challenge in industrial robotics: the need for accurate, easy-to-use robot simulation.

One way we have done this recently is to incorporate the Realistic Robot Simulation (RRS) project. The RRS is an ambitious initiative designed to address the current limitations in the accuracy of offline generated programs for industrial robot.

The primary goal of the RRS is to enhance the precision of robot programs, enabling a more economic and efficient application of industrial robots.

We have created an RRS project add-in which helps to improve the accuracy of robot programs developed with RoboDK. It provides an interface to incorporate accurate robot controller software for motion behavior into offline programming.

Finding the Right Level of Simulation for Your Application

How can you find the right level of virtual environment realism for your robot simulation?

Here are a few tips for finding the right level of realism for your application:

  1. Understand the simulation needs for your project — Begin by outlining your project objectives and defining the purpose that your robot will serve.
  2. Evaluate your interactions — Consider both the physical and other interactions that your robot will have with the environment and other components in the workspace.
  3. Assess the operational environment — Evaluate which elements of the environment need to be included in the simulation.
  4. Be realistic about visual realism needs — Look at the rendering and visual requirements of your simulation. Identify what aspects are really necessary.
  5. Determine your performance requirements — Identify the level of computing performance required from the simulation tasks. For example, high-precision tasks might need more detailed simulations.
  6. Factor in your budget and resources — Lastly, consider your resources and budget. More realistic simulations may demand more computing power and programming skills.

With all of these, strive for balance — a simulation that meets your needs without being “too much.”

Remember, creating realistic robot simulations is fundamental when working with modern robots. By using the right tools, like our RRS add-on, you can create a robot simulation that works for you.

What questions do you have about accuracy and realism in robot simulations? Tell us in the comments below or join the discussion on LinkedIn, Twitter, Facebook, Instagram, or in the RoboDK Forum.. Also, check out our extensive video collection and subscribe to the RoboDK YouTube Channel

The post Creating Realistic Virtual Environments for Robot Simulation in RoboDK appeared first on RoboDK blog.

]]>
How to Create Powerful Robot Macros and Custom Tools in RoboDK https://robodk.com/blog/how-to-create-powerful-robot-macros-and-custom-tools-in-robodk/ Mon, 08 Jan 2024 12:30:34 +0000 https://robodk.com/blog/?p=6664 In industrial robotics, customization is not just a “nice to have.” It’s a necessity for flexible operational success. Custom tools and macros can be a driving force behind this flexibility. …

The post How to Create Powerful Robot Macros and Custom Tools in RoboDK appeared first on RoboDK blog.

]]>
In industrial robotics, customization is not just a “nice to have.” It’s a necessity for flexible operational success. Custom tools and macros can be a driving force behind this flexibility.

Both custom tools and macros allow to automate more complex robot tasks and adapt the basic robotic hardware to your needs.

RoboDK offers various features for creating powerful robot macros. With these, you can take your robot deployments to new heights by adding extra functionality that would not be available otherwise. And with its support for custom tools, there’s no limit to the accessories you can add to your robot.

Here’s how you can harness the power of custom macros and tools:

The Role of Robot Macros in Streamlining Complex Tasks

In the context of industrial robotics, a macro is essentially a pre-defined sequence of commands or scripts that allows you to automate complex programming tasks.

A macro script will, for example, convert a specific input or robot command into a desired output. They can be used to control the simulated robot within RoboDK or the physical robot in your workspace.

An example could be using a robot arm for a welding task. Macros could automate the arm’s motion along the desired welding path, operate a specific welding tool, and even adjust welding parameters on the fly to accommodate more complex welding operations.

Creating Your First Robot Macro in RoboDK

How can you create a macro for your robot application within RoboDK.

Here is the process that you can take:

  1. Create your simulation without the macro first. Use as much of the basic RoboDK functionality as you can, to identify where a custom macro is really required. You may find that you don’t need a macro, as RoboDK has an impressive range of in-built functionality.
  2. Choose your programming language. You can program macros in RoboDK using whichever programming language you are most comfortable using. RoboDK’s API seamlessly integrates with popular languages like Python, C#, C++, and Matlab.
  3. Create and optimize your macro scripts. Create a macro script that carries out your desired functionality. Keep it simple — you only want to add the functionality that is really required.
  4. Activate and thoroughly test the macro. Load the macro into the RoboDK simulation environment and put it through its paces. You will probably need to tweak the script to get it ready.
  5. Continuously improve. The most useful macros are those that have been optimized over time. Where possible, improve existing macros when you notice ways you could improve them.

Custom Tools: An Essential Asset in RoboDK

A related concept within RoboDK is custom tools. These allow you to add any tool or end effector to your robot application.

There are too many robot tools on the market to incorporate all of them in our Robot Library. By providing this method to integrate custom tools, we have opened up any tool to the power of RoboDK… even tools that you have custom designed yourself for your application!

You can find a complete guide to adding custom tools in our article The 5 Minute Guide to Use Any End Effector with RoboDK.

7 Example Macros to Help You Get Started

It’s easier to understand what you can achieve with macros when you see ones that already exist.

Macro functionality can be complex, such as running entire routines with your robot, or simple, such as turning on a single output to activate a tool.

Here are just 7 of the many macros that are included in RoboDK:

  1. CameraLiveStream — This macro demonstrates some of the basic functionalities to handle 2D cameras with the RoboDK API, such as setting camera parameters and displaying a live stream.
  2. DoPointWeld — This macro simulates a spot weld gun, allowing you to turn the gun on and off. This is ideal for welding applications such as those in automotive manufacturing.
  3. Draw_SVG — This macro programs a robot to draw a picture using an SVG image file as an input. This can be especially useful when you are designing personalized products for your customers.
  4. MirrorRealRobot — This macro creates a bridge that moves the physical robot to match your simulated robot. For example, you can use it to control your robot with a 3D mouse or other input device.
  5. SetTool_ID — This simple macro updates the robot’s tool to a given identification number that you pass as an argument. One use case is in CNC machining, where tool changes are frequent.
  6. SpindleOn — This macro allows you to add a trace or spray deposition for surface coating of materials. It activates the spindle.
  7. WaitDI — This macro simulates the waiting for a virtual input that would be a physical wait in a physical task.

These are just a few examples of robot macros that already exist in RoboDK. As you can see, there is a wide range of uses for such a simple programming concept.

The Intersection of Robot Macros and Custom Tools: A Paradigm Shift in Industrial Robotics

Both robot macros and custom tools are simple but immensely powerful concepts that can bring your robot deployments to another level.

By combining the two concepts, you can build robot applications that incorporate any functionality that you need.

If you are not sure how to program a particular macro functionality, a good place to start is in our RoboDK documentation which includes extensive instructions to guide you through the process. There is also a helpful section on adding custom tools.

If you are stuck and have any questions about developing scripts, a good place to add your question is in the RoboDK Forum where a community of robot programmers are waiting to help.

What functionality would you like to add with a macro or custom tool? Tell us in the comments below or join the discussion on LinkedIn, Twitter, Facebook, Instagram, or in the RoboDK Forum.. Also, check out our extensive video collection and subscribe to the RoboDK YouTube Channel

The post How to Create Powerful Robot Macros and Custom Tools in RoboDK appeared first on RoboDK blog.

]]>
9 Types of Robot Welding: A Breakdown of Common Types https://robodk.com/blog/9-types-of-robot-welding/ Thu, 21 Dec 2023 11:03:14 +0000 https://robodk.com/blog/?p=6797 Welding is a crucial process in many manufacturing environments. Robot welding is a tried and tested way to improve your process and there are various types. At RoboDK, we have …

The post 9 Types of Robot Welding: A Breakdown of Common Types appeared first on RoboDK blog.

]]>
Welding is a crucial process in many manufacturing environments. Robot welding is a tried and tested way to improve your process and there are various types.

At RoboDK, we have long celebrated the advantages of robot welding. Robots can help counteract many common challenges of welding, including skills shortages, weld quality, and consistency.

With the right robot and programming software, you can move to an automated welding process even if you have little to no robotics knowledge. But there are various decisions you need to make, including what type of robot welding you are using.

Let’s look at why we would use robot welding and explore some common types.

Where Are We At With Robotic Welding?

Over the years, robotic welding has undergone significant advancements both in technology and demand. It has been propelled from simplistic, repetitive welding tasks to complex, high-precision operations.

From the development of sophisticated robot sensors and algorithms to easy-to-use programming options that reduce barriers to entry, robot welding is now more accessible than ever.

A huge driver for robot welding is the presence of skills shortages within the job market. This is becoming a significant problem across the world.

Countries are implementing radical changes to combat the shortage, including refocusing goals of STEM education and investing in apprenticeships. However, these are longer term solutions.

Robots offer an immediate and powerful approach to combat welder shortages. They help you get the most from your existing skilled welders.

Benefits of Robotic Welding Over Manual

Robotic welding also brings many benefits over entirely manual welding.

Some benefits include:

  • Improved weld quality — Robots can produce higher-quality welds than human as you can program the weld pattern exactly.
  • Safer working — Welding can be a dangerous task for human workers. Moving it to a robot reduces the chances of danger for workers.
  • Flexibility — With an intuitive programming interface, you can easily reprogram your robot for any new task.
  • Consistent welds — A robot will reproduce the same weld pattern every time, making it more consistent than a human welder.
  • Better use of talent — With only a few skilled welders on your team, you can use robots to scale your welding operation with a surprisingly short training time

With such benefits, it’s well worth finding out if robotic welding could work for you!

8 Common Types of Robot Welding You Might Use

There are various types of robotic welding, each suited to slightly different applications or setups.

Which you choose will depend on your specific needs. However, you can program all of them using RoboDK.

With the right robot and programming software, you can transition to an automated welding process even if you have little to no knowledge of robotics. However, there are various decisions you need to make, including what type of robot welding you are using. Offline Programming (OLP) is considered the best option for complex modern welding projects.

Let’s explore why robot welding is beneficial and delve into some common types.

1. Resistance Spot Welding

Resistance welding involves passing a strong electric current through two pieces of metal. This heats and melts the metal, forging the two pieces together.

Resistance spot welding, specifically, involves welding individual spots instead of a continuous line of weld. You would use a spot welding tool as the robot’s end effector.

2. Laser Welding

Laser welding uses a concentrated beam of high-energy light to melt and fuse the materials together. This method is highly precise and can be used to weld small, complex parts.

Robotic laser welding is often used in industries like electronics and medical device manufacturing.

3. Hybrid Laser Welding

Hybrid laser welding combines laser light welding with arc welding. This method provides the deeper penetration of the laser welding with the superior gap bridging abilities of arc welding.

Robotic systems for hybrid laser welding are particularly useful for applications that provide high production speed and accuracy.

4. Shielded Metal Arc Welding (SMAW)

Shielded metal arc welding, or stick welding, uses a flux-coated electrode to create the weld. This method is known for its versatility and can be used on a variety of metals and alloys.

Robots using SMAW can benefit from adding image recognition to detect and repair cracks in the material.

5. Gas Tungsten Arc or Tungsten Inert Gas Welding (GTAW/TIG)

A highly common welding process, GTAW or TIG welding, uses a non-consumable tungsten electrode and a shielding gas to produce the weld. This method is known for producing high-quality, clean welds with an excellent aesthetic finish.

Robotic welding of this type is often used where weld quality is critical, such as aerospace and nuclear power plants.

6. Thin Gauge Arc Welding

Thin gauge arc welding is typically used for welding thin sheets of metal. This can introduce challenges, as thinner material requires a delicate approach.

When programming your robot welding, it may be a good idea to do extra physical testing to ensure the thin material doesn’t warp.

7. Plasma Welding

Plasma welding uses a constricted arc or plasma jet to melt the metal, creating a more focused, controlled weld. [It is related to TIG welding].

In the robotic tool, an electric arc forms between a tungsten electrode and the material, with a plasma gas to stabilize the arc and prevent oxidation.

8. Metal Inert or Active Gas (MIG/MAG) Welding

Finally, MIG or MAG welding are forms of gas metal arc welding that use continuously fed wire and a shielding gas.

Robotic MIG/MAG welding offers speed, efficiency, and adaptability, making it widely used across industries.

How to Program Robot Welding More Easily

Robotic welding has become an essential tool in various manufacturing industries. However, proper programming plays a pivotal role in ensuring its success. Let’s see some key considerations for programming robot welding more easily.

  • Choosing the Right Robot and Software: Before you start programming, it’s essential to select the appropriate robot and programming software for your welding application. Ensure that the robot you choose meets the specific requirements of your welding project.
  • Offline Programming (OLP): Consider using Offline Programming (OLP) for complex modern welding projects. OLP allows you to program and simulate your robot’s movements and welding tasks in a virtual environment, reducing the risk of errors during actual welding operations.
  • Welding Cobots: In addition to OLP, welding cobots (collaborative robots) can simplify welding for end-users. These robots can work alongside human operators, offering increased flexibility and ease of use.
  • Feedback and Synergic Functions: Modern welding sources provide valuable feedback on the welding process. They incorporate “synergic” functions that ensure stable weld quality. This feedback mechanism helps maintain consistent and high-quality welds, reducing the need for constant adjustments.
  • Precise Calibration: Achieving the highest accuracy in weld position is crucial. Precise calibration of the welding cell and the use of machine vision systems can help ensure that your robot welds with exceptional accuracy

A good place to start is with a programming environment that supports robotic welding. Read more in our article The Simple Way to Flawless Robot Welding

What types of robot welding would you like to use? Tell us in the comments below or join the discussion on LinkedIn, Twitter, Facebook, Instagram, or in the RoboDK Forum.. Also, check out our extensive video collection and subscribe to the RoboDK YouTube Channel

The post 9 Types of Robot Welding: A Breakdown of Common Types appeared first on RoboDK blog.

]]>
Automation Integration Made Easy: How to Use RoboDK with Your Software https://robodk.com/blog/automation-integration-made-easy/ Wed, 25 Oct 2023 21:02:30 +0000 https://robodk.com/blog/?p=6467 With the right set of tools and plugins, you can make your automation integration much easier and smoother. One of the core aims of RoboDK is to make robots as …

The post Automation Integration Made Easy: How to Use RoboDK with Your Software appeared first on RoboDK blog.

]]>
With the right set of tools and plugins, you can make your automation integration much easier and smoother.

One of the core aims of RoboDK is to make robots as easy to integrate as possible. Part of this means providing the tools so that your software tools all work nicely with your industrial robot.

The challenge comes when you are connecting various software tools together. Rather than a smooth integration, you end up having to piece together your own connectors and processes… which is very inefficient.

But, with the right tools and approach, automation integration can be easy.

Why Automation Integration of Software Is Challenging

It can be hard to integrate multiple software tools to create a smooth workflow.

Different software packages are often simply not designed to work together. This problem can become particularly difficult if some robot vendors don’t prioritize inter-compatibility – for example, if they want you to buy their products.

Examples of the problems that can arise when integrating different systems include:

  • The requirement for you to create custom connectors to bridge between incompatible software through their APIs (which may or may not be stable).
  • Difficulties in maintaining and updating software, as one new update could break your whole system.
  • Security risks caused by inexpert linking of different systems.
  • Complicated programming caused by complex software dependencies.

All of these challenges, and more besides, can make it extremely difficult to integrate your automation software components.

But, it doesn’t need to be like this…

3 Benefits of Using RoboDK to Integrate Your Automation Software

RoboDK offers many advantages for integrating your automation components. When used for integration, it provides a powerful tool that acts as a link between your existing software workflow and your physical robots.

Here are 3 benefits you can get with RoboDK:

1. Easy Setup and Configuration

RoboDK is simple to use, even if you have never programmed an industrial robot before.

Everyone’s automation setup is often slightly different. This is why we provide a lot of configuration options, helping you to integrate the various aspects of your workflow.

2. Advanced Programming Tools

The apparent simplicity of the RoboDK software doesn’t mean a lack of functionality. There are many advanced features once you are familiar with the basics.

There is a huge range of advanced tools, including artificially intelligent trajectory planning and complex welding pattern generators.

3. Cost-effective Interoperability

Some of the other robot programming tools can be surprisingly expensive and restrictive. As many are vendor-specific, they lock you into a particular software ecosystem.

At RoboDK, we pride ourselves on making interoperability one of our core drivers and providing that in a cost-effective package.

Types of Software Compatible With RoboDK

Many types of software can make up an automation workflow.

What types of software are compatible with RoboDK? Almost any type!

Thanks to RoboDK’s powerful API, App Loader, and plugin functionalities, you can integrate a huge variety of hardware technologies and software packages with your robot.

Examples of software you can integrate with RoboDK include:

  • Computer-Aided Design (CAD) software
  • Computer-Aided Machining (CAM) software
  • Programmable Logic Controllers (PLCs)
  • 3D printing packages
  • Machine learning and other software packages
  • Cameras and other sensing hardware
  • And many more…

Even if you come across a technology or software library that nobody has ever integrated with RoboDK before, posting a quick question on RoboDK’s forum is a great way to find a practical answer quickly.

What type of software do people most often integrate with RoboDK?

Most likely, it’s CAD/CAM packages. This makes sense as people tend to design their products in computer design packages and want to send them to their robot simulation.

You don’t want to have to change your CAD/CAM package just to be able to use robots… and you shouldn’t have to!

For this reason, RoboDK has created a selection of different plugins for some of the world’s leading CAD/CAM tools. With these plugins, you can seamlessly connect your robot to your existing software. This significantly helps to streamline your workflow.

Solid Edge Robot Programming

10 Incredible CAD/CAM Packages Compatible with RoboDK

Whatever CAD/CAM package you use, there is a way to integrate it with RoboDK.

The simplest way is to export using standard CAD files. However, our native plugins make this integration even easier.

Here are 12 incredible tools that RoboDK has seamlessly integrated for you:

  • BobCAD-CAM Used by many machinists across manufacturing industries, this is a powerful mechanical design and machining software.
  • FeatureCAM The main purpose of this powerful software is to automate your programming workflow when designing NC code.
  • Fusion 360 This online tool from industry leader Autodesk is a highly popular CAD/CAM tool.
  • hyperMILL This machinist-targeted tool offers a vast array of functionality for common machining applications.
  • Inventor This superstar software is one of the most used CAD/CAM tools in the world.
  • Mastercam This is a very popular, high-end, and functionality-rich package for engineers and machinists.
  • MecSoft This CAM software is know to be powerful, affordable and easy-to-use.
  • Onshape This is the world’s fastest-growing cloud-based CAD system.
  • Rhino This software has the unique ability as a highly accurate freeform surface modeler.
  • RhinoCAM This is itself a plugin for the very popular freeform modeling tool Rhino.
  • Siemens Solid Edge This popular software from Siemens PLM is designed to be affordable, easy to use, and able to handle large assemblies.
  • SolidWorks This has become the most popular CAD software in many industries.

If you are using one of these tools, you can immediately get started integrating with robotic automation by simply downloading the associated plugin.

How to Get Started With Automation System Integration

It’s true that automation integration can be challenging.

However, when you have RoboDK handling the complex software integration steps, your job becomes much easier.

Whether you are using one of these native CAD/CAM plugins, or integrating your software through one of the various other methods, automation integration doesn’t have to be difficult.

Which automation tools would you like to integrate with your robot? Tell us in the comments below or join the discussion on LinkedIn, Twitter, Facebook, Instagram, or in the RoboDK Forum.. Also, check out our extensive video collection and subscribe to the RoboDK YouTube Channel

The post Automation Integration Made Easy: How to Use RoboDK with Your Software appeared first on RoboDK blog.

]]>
Roboguide: How To Program a FANUC Robot https://robodk.com/blog/roboguide-how-to-program-a-fanuc-robot/ https://robodk.com/blog/roboguide-how-to-program-a-fanuc-robot/#respond Fri, 22 Sep 2023 15:14:46 +0000 https://robodk.com/blog/?p=5475 Roboguide is a well-known software tool for programming FANUC robots… but it’s not the only available option. You might not have realized this before, but there are other offline programming …

The post Roboguide: How To Program a FANUC Robot appeared first on RoboDK blog.

]]>
Roboguide is a well-known software tool for programming FANUC robots… but it’s not the only available option. You might not have realized this before, but there are other offline programming tools that many FANUC users don’t even know about!

Roboguide can be a suitable solution for some people. It comes directly from FANUC so it can seem like the most “obvious” choice for offline programming.

Offline programming is an important step when working with industrial robots. It allows you to program and test your robot without disrupting your production. There are many benefits of offline programming.

Roboguide does offer these benefits… but it is not the only option available on the market. If you only consider Roboguide and don’t look at the alternatives for offline programming, you could miss some opportunities to improve your robot programming even further.

Here’s a clear introduction to Roboguide…

What is Roboguide?

Roboguide is a software application developed by FANUC that allows users to program FANUC robots offline. As with any offline programming software, it is designed to streamline the programming process and increase efficiency by allowing you to create programs without the physical robot.

The core functionality of the program is its offline programming and simulation. It also has some application-specific features such as PaintPRO for painting applications and WeldPRO for arc welding applications.

FANUC is one of the industry’s leading brands of industrial robots. You can see the manufacturer’s ubiquitous yellow-colored robots in many manufacturing companies across the globe.

It’s common for robot integrators, distributors, and suppliers to specialize in a particular brand of robot. This means that FANUC distributors often only recommend Roboguide to new robot users.

Why People Often Use Roboguide

When we visit trade fairs and conferences, we find that many FANUC users are unaware there are other options for offline programming.

Why do people stick with Roboguide when there are other options for offline programming?

As well as simply being unaware of the other options, there is also the familiarity. If you have bought your robots from FANUC, the brand feels familiar. It feels like it’s safer to buy everything from one supplier rather than looking for alternatives.

If you are looking for an alternative to Roboguide, it makes sense to consider RoboDK.

RoboDK is a powerful and user-friendly robotic programming software that makes it easy to create, simulate, and deploy programs for any industrial robot arm.

With RoboDK, you can quickly and easily create robot programs for a range of applications, including welding, palletizing, handling, and assembly tasks. It is compatible with dozens of FANUC robots and works with all the major robot brands.

All of RoboDK’s offline programming features come with a single license. You can find this on the pricing page.

Finally, there is a ton of free RoboDK training on this blog and their YouTube channel.

Robot Post Processors

Is RoboDK for You? How to Find Out

How can you find out if RoboDK is the right solution for your offline programming project?

A good place to start is by downloading a free trial.

You can also find out more about RoboDK’s features on this product page.

What issues have you run into when using Roboguide? Tell us in the comments below or join the discussion on LinkedIn, Twitter, Facebook, Instagram, or in the RoboDK Forum. Also, check out our extensive video collection and subscribe to the RoboDK YouTube Channel.

The post Roboguide: How To Program a FANUC Robot appeared first on RoboDK blog.

]]>
https://robodk.com/blog/roboguide-how-to-program-a-fanuc-robot/feed/ 0
9 Ways to Improve a Production Process with RoboDK https://robodk.com/blog/9-ways-to-improve-a-production-process-with-robodk/ Fri, 01 Sep 2023 21:09:41 +0000 https://robodk.com/blog/?p=6172 Are you looking for ways to improve your production process? Whether you are looking to optimize your workflow, automate bottleneck tasks, or prioritize continuous improvement, RoboDK can help. Simulation and …

The post 9 Ways to Improve a Production Process with RoboDK appeared first on RoboDK blog.

]]>
Are you looking for ways to improve your production process? Whether you are looking to optimize your workflow, automate bottleneck tasks, or prioritize continuous improvement, RoboDK can help.

Simulation and offline programming are valuable tools for improving production processes with robots. They help you solve the problems that can occur when adding automation in a simple, powerful, and efficient way. RoboDK offers a range of benefits that can help you automate with ease.

Let’s explore 9 tried and tested ways you can improve your production process with RoboDK.

1. Automate the Bottleneck Task with RoboDK

A bottleneck task is the one task that uses the most time or resources in your process. It holds up the rest of production and stops you from scaling your operations to meet higher demand.

A powerful way to use robots is to automate your bottleneck task.

By automating, you can add both extra throughput and consistency to the bottleneck task. The right type of robot can improve your throughput immensely, helping you to remove that difficult bottleneck. You can test the impact of this by simulating the task in RoboDK.

2. Free Up Personnel by Automating Boring Tasks

What if you can’t automate the bottleneck task in your business?

Sometimes, a task requires a human touch and can’t be automated. If such a task is causing a bottleneck in your workflow, you might not be able to solve it with a robot.

But there is still a solution. There are probably several boring, repetitive tasks that take time from your workers. Here, you can automate those tasks to free up personnel for the bottleneck task.

3. Incorporate Robot Thinking into Product Development

Adding a robot can also affect production in less obvious ways. For example, your product development process can improve immensely by considering the constraints added by a robot.

Robots require their tasks to be regular and consistent. Often, this means you need to adapt your processes to make them easier to achieve with robotic automation. This robot thinking can help make your process more robust and efficient, even before you consider the productivity of the robot itself.

RoboDK is an ideal tool for testing designs and processes during this product development step. You can test your ideas in the simulator and optimize them before putting them into production.

4. Eliminate Waste and Optimize Cycle Time With RoboDK

Waste is a key factor when you want to improve your production processes. By eliminating waste, you increase productive time and improve efficiency.

With robots, the most common source of waste is unnecessarily long cycle times. When the robot moves more than is necessary or handles material too much, you are wasting valuable time and effort.

RoboDK offers several features for improving cycle times. These include cycle time analysis, intelligent motion planning algorithm, and CAD tool integration.

5. Analyze and Optimize Workflows in the Simulator

Analysis is a key step when you are working to improve your production processes. It allows you to see and understand what is happening in your process, helping you identify opportunities for improvement.

The challenge is that, in the physical world, it’s hard to accurately measure the performance of individual steps in your production process. Real-world data can be messy and many factors influence performance.

Robot simulation provides a valuable tool for analyzing your automated process in depth. You can simulate the effect of changing different variables, helping you to optimize your automated workflows.

6. Train Workers to Use Robots for Continuous Improvement

People are the most important factor in production. When you have knowledgeable, trained, and experienced workers, they can help to improve production continuously.

Most people still have little experience with robots, which can make it hard for them to know how to contribute to automated process improvement.

RoboDK offers a range of free and paid training resources for those looking to improve their robotics knowledge. They teach you how to use robots effectively and spot potential areas for improvement.

7. Test New Machine Purchases Using Simulation

We all know that buying new machinery can be expensive and time-consuming. You don’t want to invest in a robotic system only to find that it doesn’t work for your specific task or requirements.

With RoboDK’s simulator, you can quickly and easily test many different robots for your task before you make a purchase. This reduces the risk of investing in robots and will help to speed up the deployment process.

8. Create Standard Components for Copy-Paste Robot Cells

A significant benefit of offline programming — i.e. programming the robot in a simulator — is the ability to create standardized templates and program modules you can easily reuse between robot projects.

This also means that you can create “copy-paste” robot cells. Once you have successfully deployed one robot to a task, you can create an exact replica of this robot using the same programming template. In this way, you can easily scale your robotic capabilities.

9. Develop a Culture of Robotic Automation

While you could use RoboDK for just one robot deployment, the real power of using robots is when you develop a “culture of robotic automation.”

By making robots an integral part of your workflow, you can continue to save time and budget for years to come. With RoboDK’s offline programming and simulation features, you can easily test new ideas for robotic automation and quickly deploy those ideas once you have optimized the programs.

There are so many ways that RoboDK can help you improve your production process. So get started today!

How could robot offline programming and simulation improve your production process? Tell us in the comments below or join the discussion on LinkedIn, Twitter, Facebook, Instagram, or in the RoboDK Forum. Also, check out our extensive video collection and subscribe to the RoboDK YouTube Channel

The post 9 Ways to Improve a Production Process with RoboDK appeared first on RoboDK blog.

]]>
Easier and Faster Offline Programming https://robodk.com/blog/industrial-robot-offline-programming/ Mon, 28 Aug 2023 19:06:09 +0000 https://robodk.com/blog/?p=6462 Robots are becoming one of the most commonly used technologies in many industrial settings. However, programming industrial robots often remains a complicated process. Offline programming offers a way to make …

The post Easier and Faster Offline Programming appeared first on RoboDK blog.

]]>
Robots are becoming one of the most commonly used technologies in many industrial settings. However, programming industrial robots often remains a complicated process.

Offline programming offers a way to make industrial robot programming easier, faster, and more flexible.

With the right approach to offline programming, you can create powerful programs for your industrial robots without needing extensive robotics expertise or expensive solutions.

But what makes offline programming such a compelling approach?

What challenges might you encounter when moving to offline programming?

And how do you create a reliable system quickly and easily?

Let’s look at how you can get the most from industrial robot programming offline…

What is Offline Programming for Industrial Robots?

Offline programming (often shortened to OLP) is a method of industrial robot programming that enables you to program robots without needing access to the physical robots.

This type of programming lets you create, test, and improve your robot programs in a simulated virtual environment. With OLP software like RoboDK, you can create these programs visually, without needing to type any code… unless you want to, of course.

Once you’re sure your program functions correctly – having debugged it in the simulator — the OLP software then converts your program into instructions that your robot controller understands. This is done by a post-processor for your particular robot model.

Beyond basic OLP, there are also add-ons that make the programming process even easier. For example, RoboDK TwinTrack allows you to program any robot by moving a 3D tracking probe.

Advantages of Offline Programming for Industrial Robots

OLP offers several advantages over conventional robotic programming. It can help you get more useful and complex functionality from your industrial robots.

A few of the advantages include:

  • Easier, more efficient debugging — It’s easier to find mistakes in your robot program when you are working with a simulated robot. OLP means you first create a working program, then you handle any of the remaining issues caused by the physical robot.
  • Less disruptive, costly robot downtime — Whenever a physical robot is out of production, it costs you money. OLP allows you to reduce this disruptive time to a minimum.
  • Smoother transition from idea to production — Let’s face it, robots sometimes seem “temperamental” (like many machines). When you have a new idea, the hardware quirks can derail you from turning your idea into a prototype. OLP helps smooth this process by first creating a virtual simulation.

There are many other advantages to using OLP. You can read about some of them in our article 5 Ways Robotic Offline Programming Can Benefit Your Business.

6 Steps to Set Up an Environment for Offline Programming

If you want to get started with offline programming quickly, there are a few steps that you should follow to go from zero to a working OLP platform.

Here are 6 steps to follow:

  1. Choose an OLP platform that is user-friendly and specifically designed for industrial robot programming. Some systems, for example, are primarily designed for research settings, so would be less suitable.
  2. Plan your robot program before you start creating it in the software. Even a simple “back of a napkin” plan or a video of you walking through the task by hand can make the programming process much easier.
  3. Create the program in your OLP software. If you have never used offline programming before, there is a wealth of free training to help you get started.
  4. Do as much testing and debugging as you can in the time you have available. The more potential issues you fix in the simulator, the faster it will be to integrate your code with the physical robot.
  5. Put the robot into production. This may require a bit of extra debugging to account for the peculiarities of the physical setup.
  6. Collect data and aim to improve your robot deployment over time. This is usually inherently more efficient with OLP because you don’t have to take the robot out of production to test new ideas for improvements.

By following these high-level steps, you can set up your OLP environment for easy, efficient industrial robot programming.

Common Challenges with Robot Programming

Of course, we all know that simply presented steps like those listed above can sometimes hide a lot of complexity.

It’s likely that you will encounter at least some challenges that you need to overcome, especially if you’ve never deployed a robot before with offline programming.

Here are 5 challenges you might encounter with OLP, each with a resource where you can start looking for solutions:

And remember that there is always help at hand. If you are struggling with any aspect of robot programming, a good place to look for answers is in the RoboDK user forum.

Why RoboDK Makes Industrial Robot Programming Easier

RoboDK is one offline programming tool that many industrial users find extremely useful. It offers a powerful set of functionalities that help make your robot programming easier, faster, and more efficient.

Whether you are an experienced robot programmer or you have never used an industrial robot before, be assured that offline programming can help you.

What are your next steps? A good place to start is to explore some of the resources already shared in this article, to see how offline programming could apply to your specific process.

What challenges do you foresee with industrial robot programming? Tell us in the comments below or join the discussion on LinkedInTwitterFacebookInstagram, or in the RoboDK Forum.. Also, check out our extensive video collection and subscribe to the RoboDK YouTube Channel

The post Easier and Faster Offline Programming appeared first on RoboDK blog.

]]>
Introduction to RoboDK’s API: How to Automate Repetitive Tasks https://robodk.com/blog/introduction-to-robodks-api-how-to-automate-repetitive-tasks/ Mon, 14 Aug 2023 20:57:20 +0000 https://robodk.com/blog/?p=6377 The RoboDK API offers a powerful set of tools for you to quickly and easily program more complex robot tasks. It is the perfect tool for automating repetitive robot programming …

The post Introduction to RoboDK’s API: How to Automate Repetitive Tasks appeared first on RoboDK blog.

]]>
The RoboDK API offers a powerful set of tools for you to quickly and easily program more complex robot tasks. It is the perfect tool for automating repetitive robot programming tasks in your business.

For many people, RoboDK’s standard graphical user interface is their primary method for using the software. While this is a very intuitive way to program your robot – especially if you are a beginner – the software has a lot more capabilities than you might first realize.

With the API, you can create some very sophisticated programs in just a few lines of code in your favorite programming language.

Whether you’re looking to automate simple repetitive programming tasks or you want to take on more complex challenges, here’s how to use the API…

Automating Repetitive Tasks with RoboDK’s API

One of the tremendous benefits of using robots is that they can take over the dull and repetitive parts of people’s jobs.

But programming robots can also be dull and repetitive. When you have to perform the same programming and configuration steps over and over, you might wish that you had a robot to program your robot.

This is where the API comes in!

With the API, you can script and automate parts of your programming process in just a few lines of code.

Here are a few examples of programming tasks that you could automate:

  • Motion and trajectory generation — Perhaps you repeatedly need to generate new robot trajectories, such as when a new product is added to your production. You could create a program to generate these trajectories programmatically and then call the RoboDK API to generate the robot program.
  • Passing parameters from other programming steps — The more you automate your production line, the more you will need to pass information between different automation stages. You can use the API to create middleware programs between to act as a bridge between these steps.
  • Monitoring the robot’s performance — You can also create programs to monitor the operation of the robot. This could involve simple error reporting or a more complex setup with vision sensors. You could then use the API to send corrective instructions to the robot.

You could even employ more advanced programming techniques, such as using artificial intelligence and machine learning.

Understanding the 5 Elements of RoboDK’s API

What do you need to know about the RoboDK API? It’s helpful to understand the core components.

Below is an overview of the main 5 elements of the API. You can find out more details in the extensive API documentation (here the Python API).

The robolink module is the main module of the API. It provides the fundamental functionality to interact with the RoboDK software and your code.

Robolink can access any item from within your RoboDK program tree, load models, define tools, set robot movements, and generate programs.

2. robomath

Robotic programming often involves a lot of geometrical mathematics. These are difficult to calculate using the standard mathematics functions in most programming languages.

To make this math easier, we have implemented the robomath module, based on the Robotics Toolbox by Professor Peter Corke.

3. robodialogs

Much of the functionality in the graphical interface of RoboDK involves interacting with message boxes and other types of dialogs.

The robodialogs module contains functionality to handle these dialogs, including opening and saving files.

4. robofileio

RoboDK supports a wide variety of file types, including robot program files (such as ABB’s .mod or KUKA’s .ls), CAD files (such as .step or .stl), and standard data files (such as .txt or .csv).

The robofileio provides functionality to handle and analyze files, such as finding if files exist and generating safe variable names that can be used for robot programming.

5. roboapps

Finally, the roboapps module is the API interface for the RoboDK Apps toolbox.

The RoboDK App interface allows you to extend the functionality of RoboDK even further. It allows you to load scripts and executable files as if they were plug-ins in RoboDK software.

RoboDK API Python Robot Programming

An Example of Automating a Complex Trajectory with the API

What does it look like when you use the RoboDK API for more advanced programming automation?

Let’s look at an example of robot art generation (which is a common usage for RoboDK among artists). In this case, say we are using Python to create a fractal trajectory with the robot.

Programming a fractal with RoboDK’s graphical interface alone could be a very tricky activity. Fractals are, by nature, programmatic – they are defined by mathematical formulas. So it makes sense to use programs to create them instead of a graphical interface.

A basic form of fractal is the Koch curve. It is fairly simple to program a Koch curve in Python. Using the method explained in this example here to create a Koch Snowflake, you could generate a Koch curve in your Python code and send the resulting trajectory points to your robot with the RoboDK API. This would be possible in very few lines of code.

If you wanted even more complex fractal designs, such as the Barnsley Fern or Mandelbrot Set, you could also achieve these in a similar way. Most of your program would stay exactly the same – only the fractal generation function would change.

How to Get Started With the RoboDK API

The RoboDK API is a powerful tool that can help you optimize and streamline your robot programming process.

With programming languages like Python or MATLAB, programming doesn’t even have to be difficult. The languages themselves are intuitive enough that you don’t need to be a highly skilled programmer to create powerful programs.

Get started with the RoboDK API by heading over to the documentation and having a look at what it is capable of!

What programming tasks do you find repetitive? Tell us in the comments below or join the discussion on LinkedIn, Twitter, Facebook, Instagram, or in the RoboDK Forum.. Also, check out our extensive video collection and subscribe to the RoboDK YouTube Channel

The post Introduction to RoboDK’s API: How to Automate Repetitive Tasks appeared first on RoboDK blog.

]]>